
Fixed wing or quadcopter? How to make a wise and informed choice
For those outside the industry, the term “drone” covers all types of latest-generation flying machines, with no real distinction between...
· 3 min read
Pix4D and Metashape are software packages dedicated to surveying and geomatics professionals. They generate point clouds, DEM / DSM, 3D models and orthomosaics from photos captured by drones and ground cameras. They allow you to process a survey, calculate areas and volumes, and even inspect architectural structures. The final results can be exported in the most common formats (GeoTIFF, DXF, etc.) and used by GIS (QGIS) or third-party CAD software (AutoCAD).
Pix4D is a software suite developed in Switzerland: the photogrammetric processing software is called Pix4Dmapper.
Agisoft Metashape is software developed in Russia with unique features such as calculation speed and accuracy of results. Metashape is strictly dedicated to photogrammetric processing.
It is clear that the Metashape interface is much less intuitive than that of Pix4Dmapper.
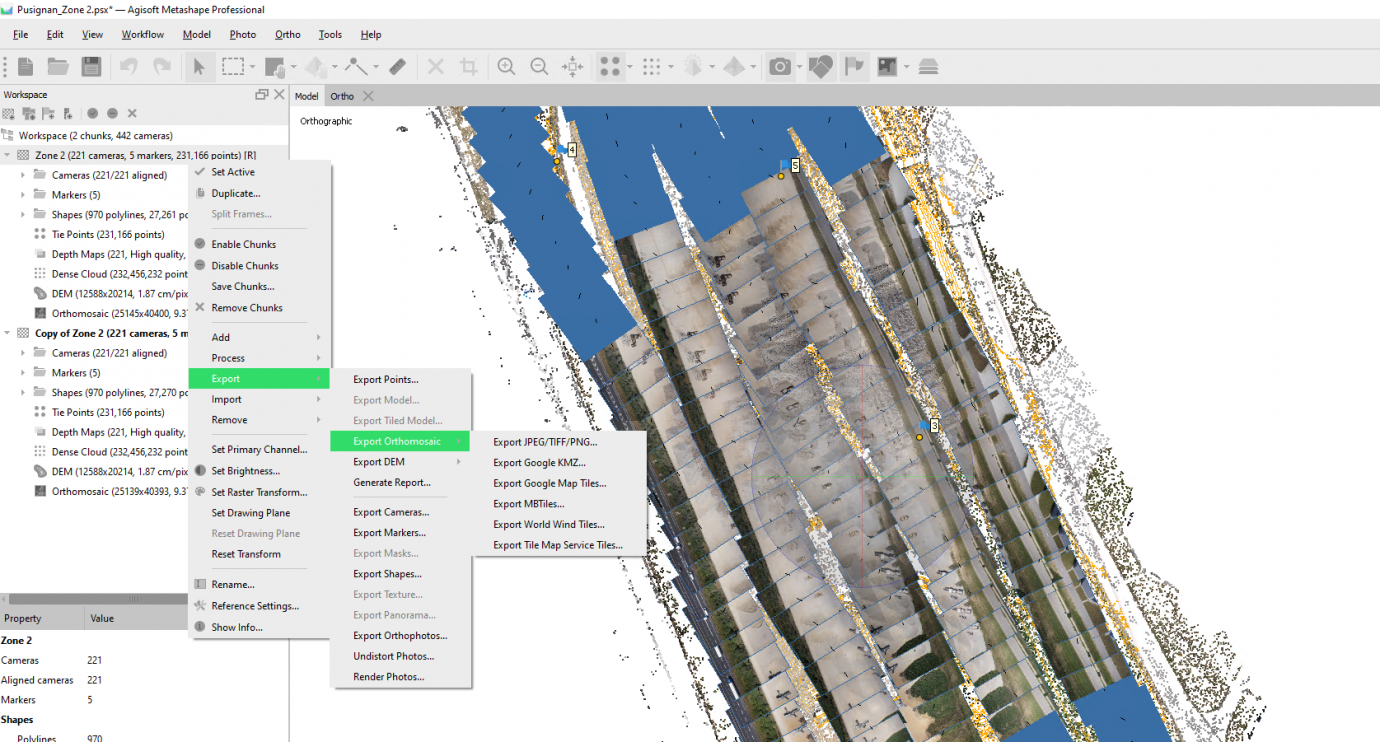
Metashape interface:
Pix4Dmapper interface:

The basic workflows of Pix4Dmapper and Metashape are almost identical: alignment, tie point detection, building the point cloud and the 3D model (mesh and texture), DEM, orthomosaic.
The photo import, which is very intuitive, lets us see the image coordinates and the coordinate system at a glance:

Once processing has started, the progress bar lets you follow its evolution. The processing progress is displayed on the map in real time. Meanwhile, the images take on different colors:

The interface is austere and the settings are numerous. However, every step must be carefully considered. The product datasets (dense cloud, mesh, texture, DEM, orthomosaic) can be placed in different "chunks" within the same project, which allows you to vary parameters and make comparisons or qualitative treatments.
Unlike Pix4Dmapper, each post-processing step is configured and run on the fly. The main benefit is total control over the process.
There are no background images or maps because Metashape is anything but cosmetic: efficiency comes first.

The photo alignment step lets you check their overlap and view a sparse point cloud:

In the case of unaligned photos, it is therefore possible to perform the operation manually by placing markers common to the unaligned photo and the adjacent photos.
In Pix4Dmapper the overlap is checked through the rayCloud, which also contains all the elements: overlap, camera position, point cloud, classes.

The calculation is integrated into the Pix4Dmapper processing stage, and from it derive in particular the classification, the orthomosaic and the mesh. This concept of layers makes using Pix4Dmapper really pleasant: everything is accessible and selectable at a glance.
Mesh generation and the application of its texture (UV map) are handled separately in Metashape.
For the same quality and quantity of photos (high quality), Metashape generated the orthomosaic in about 2:30 versus 3:20 for Pix4Dmapper. It seems that the power and the hardware resource utilization capabilities of the algorithms work in Metashape's favour.
Once the project is complete, the subsequent operations take much longer in Pix4Dmapper, and some of them seem not to provide all the information that Metashape does.
Generating the DEM (15 minutes) and the 3D model with 3D texture (1h40) are operations that must be run after the fact when using Pix4Dmapper.
This is in addition to the 3:20 already completed.
Metashape orthomosaic , 2.1 GB tif file:

Orthomosaic Pix4Dmapper , 1GB tif file:

Warning! The orthophoto appears more pixelated and therefore lower in resolution than the Metashape one. It is not: it is an optimization for display speed.
Comparative orthomosaic resolutions:
Pix4mapper with a GSD of 0.965 cm / px :

Below, Metashape with an almost identical GSD of 0.937 cm / px:

Hard to tell any difference! The two images are almost identical.
One of the notable differences I noticed is that the Metashape DEM can be generated from the point cloud or the orthomosaic without going through the mesh. This significantly reduces processing time.
Pix4Dmapper has to build its mesh model, from which the volume / area / distance calculations are performed.
The shapes delimiting stockpiles or other features can be exported and reused as part of volume monitoring in either software.


In Metashape the measurements are made starting from manually pointing the tool to choose the reference plane, which must remain identical for the following cubature values (base plane).
Here are the results according to the reference planes:

In Pix4Dmapper you use rayCloud to calculate distances, perimeters, surfaces and volumes:

The order of magnitude is consistent in both software packages. Obviously, the volumes cannot be strictly equal since the selected area is slightly different.
For information, the difference between the measurements taken on site with the client and Metashape is in the order of +/- 5m 3 on a reference plane at an altitude of 259.17m.
Both software packages are a matter of personal preference and of skills in photogrammetry and computing.
Pix4Dmapper is better suited to operators less inclined towards technical work, thanks to very simple and intuitive handling at the expense of control over processing.
The presentation of results is more meaningful for the end client, who is often more familiar with conventional or laser (LiDAR) surveying than with photogrammetry.
Metashape is much more sophisticated and requires a good knowledge of photogrammetry theory. It offers advanced features, including: advanced optical corrections, automatic recognition of ground targets, manual photo alignment, use of masks, the ability to multiply chunks and run different processing workflows and / or settings. To sum up: absolute control.
Metashape can handle large projects. Thousands of shots can be processed, even simultaneously on multiple workstations within a cluster, parallelizing the calculations and multiplying the CPUs.
Finally, Metashape can extract frames from a video capture when the flight planning software does not have enough options to take quality photos. A video capture can be useful for capturing a cliff or following a winding road in FPV.
Thanks to the Flyingeye.fr team for the images.
Jun 22, 2016
Apr 7, 2016
Feb 16, 2016
Jan 14, 2016
Aug 19, 2014
Selected by our staff based on the topic of the article. Not sure which one to choose? Ask us for advice.


We help you choose the drone, sensors and software based on the job to be done, with training and after-sales support. We usually reply within one business day.
For those outside the industry, the term “drone” covers all types of latest-generation flying machines, with no real distinction between...
· 3 min read
Ever since the first quadcopters on the market used only a GoPro as a payload to shoot video, without relying on a proper system of...
· 3 min read
The development of specialized software applications has made it possible to tackle and solve complex problems concerning the automation and optimization of many...
· 3 min read
🍪 Cookies on AerialClick
We use technical cookies, which are necessary for the site (cart, login). With your consent we also use marketing cookies (Meta) to measure campaigns and show you relevant ads. You can change your mind at any time from "Cookie preferences" at the bottom of the page. Cookie policy